Sunday, 15 February 2015

My Top 2 Mascaras


If I was told I could only wear one item of makeup for the rest of my life, I would 100% choose mascara.


Now when it comes to picking a mascara, I am extremely particular and fussy! I have tried out many over the years and have always ended up going back to the same two. I have never been able to get on with a soft bristle applicator mascara, no matter how many different ones I have tested. They just don't do anything for my lashes. So my two favourites have plastic bristle applicators at the end.
 

The first one I am going to talk about is my go to mascara that I have repurchased countless times. It's the Rimmel London Lash Accelerator Endless Mascara. Being a drugstore product,  it is pretty affordable. It's not the cheapest but at £8, I think it is worth every penny. It doesn't dry out, and it lasts for ages, even when I apply at least 3 coats of it to my lashes every day. It is great for lengthening the lashes and separates them out beautifully.

 
As it is extremely buildable, it also allows you to get loads of volume in your eyelashes too. It has been my favourite drugstore mascara for over 3 years now, and no other has even come close.


My second favourite mascara I'm going to discuss is the Benefit They're Real Mascara. Now I personally don't class this one a drugstore even though you can get it in Boots, because it costs £19 for a full size one. I have only ever purchased myself the smaller tube at an extortionate £10, and have always asked for the larger as a gift.
 
 
I absolutely love this mascara, but as I feel the Rimmel mascara is an excellent dupe, I can't justify the extra £10 for this one all the time. Just like the Rimmel Lash Accelerator, it lengthens and thickens the lashes to perfection. I do find this one dries out quicker however, which is slightly disappointing.


I'm always on the look out for a new one that can live up to these two, so if you have any suggestions, please let me know! If you haven't given these to a go, I honestly can't recommend them enough.
 
xx


Monday, 9 February 2015

Follow my blog with Bloglovin

Hey everyone. Just a quick post to say you can now follow me on Bloglovin!


xx

L'Oreal Elvive Fibrology Shampoo and Conditioner

I have to admit, my hair is one of my few features I really like, however, I've always wished it was slightly thicker. I've never really ventured into the world of hair extensions, as they can be very damaging to your natural hair, and they are very costly to get any decent and natural looking ones. I would also worry that if I did like them, I would rely on them too much, and grow to dislike my natural hair if I did not have them in.
 
I happened to be watching TV, and a particular advert caught my eye. It wasn't a spectacular advert by any means, but the product intrigued me. I have to say this is probably the first thing I have ever purchased because I saw it on the TV! The L'Oreal Elvive Fibrology  line boasts to give thicker hair wash after wash. It is said to work by penetrating deep within the fibre to expand and thicken the hair with long lasting results.


As it was on offer for 2 for £4 in Superdrug, I thought I'd give it a whirl! I picked up a bottle of the shampoo and conditioner, and there is also a 'thickness booster' available. I've been using the two products together now for at least 6 weeks, and I am very happy with the results it has given. Even after the first initial use, my hair felt a lot fuller and lighter on my head. I have found that my hair needs washing less often that it previously required, and I'm quite sure this is due to the fact it doesn't sit so flat on my scalp. It feels lighter and looks noticeably more voluminous. It also smells delicious, which is always and added bonus with any hair product.
 
I am keen to try the thickness booster now that I am pleased with what the shampoo and conditioner have done for my hair. My mum has also been using the two products, and too feels that they have made a significant difference to her hair. I am very reluctant to go back to my old hair cleaning and conditioning products, as they just simply can't live up to my new expectations!! If you feel your hair lacks that oomph, then I can't recommend trying these products enough.

 
xx


Sunday, 8 February 2015

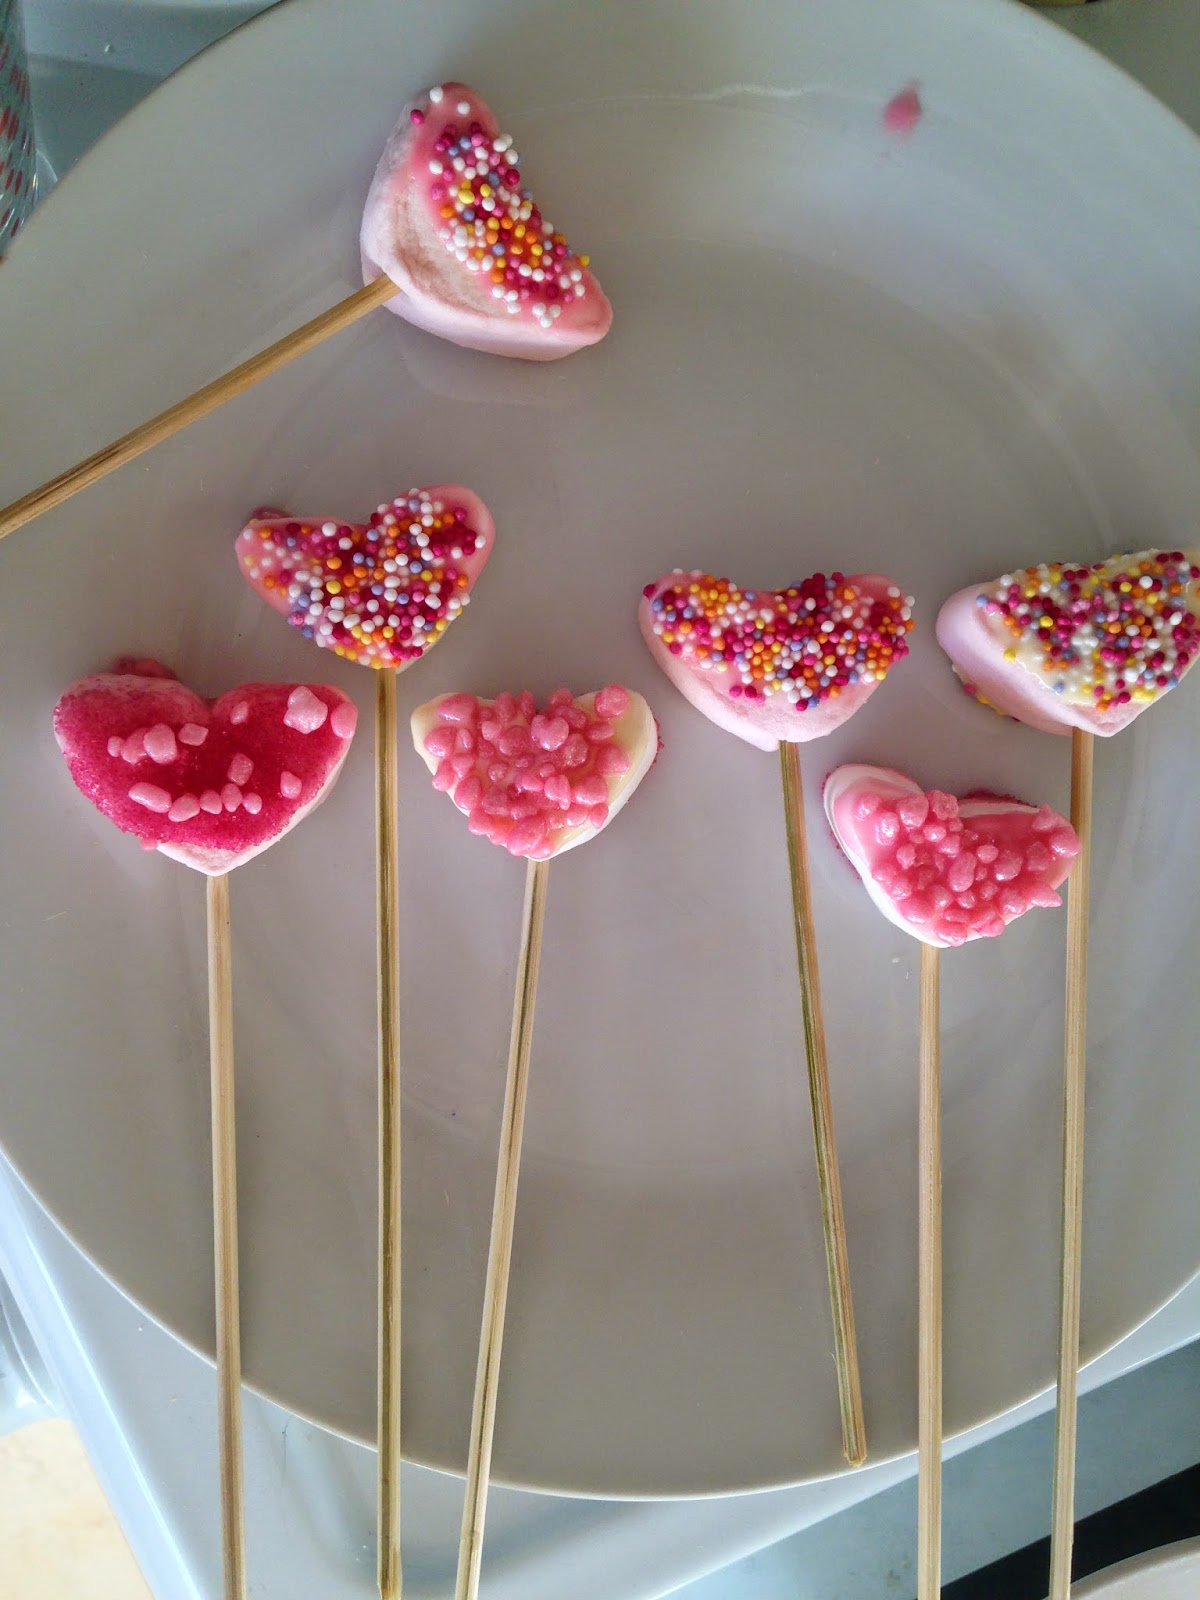
Valentine's Day Treats - MARSHMALLOW POPS

These Valentine's Day treats are super easy and quick to create!
 
 
You will need:
 
  • Marshmallows (mine are heart shaped to run with the theme)
  • Pink icing sugar
  • White chocolate
  • Variety of sprinkles
  • Cocktail sticks or skewers
 
The first thing you need to do is to start melting the white chocolate and make up some pink icing.


Then make sure the cocktail sticks or skewers are the desired length, and cut if necessary.
 
 
Once they are a suitable length, push the marshmallows onto the end of each stick. Sprinkle your decorations out onto plates, so that you can easily stick them onto the marshmallows once you are ready.
 
 
Then its time to get creative! Dip the marshmallows into the melted chocolate or icing sugar (I did a mixture of each) and stick them onto your decorations. Make sure they are nicely coated. You can do both sides of the marshmallow or just one side. Again I did a mixture.
 
 
Once you have finished being creative with your designs, leave them on a plate so that the chocolate and icing sugar has time to set.
 
 
And hopefully you should end up with some very pretty little marshmallow pops which can be enjoyed by everyone!
 
 
HAPPY VALENTINE'S!!
 
xx


Valentines Day Treats - HEART CHOCOLATE BITES

 
For these cute Valentine's day treats you will need :
 
  1. A heart shaped cupcake mould tray (mine is a silicone one from Waitrose)
  2. White Chocolate
  3. Pink, Red and/or purple sweets (Smarties)
  4. Sprinkles
The first thing I did was set up a pan of hot water with the white chocolate in a bowl over it to begin to melt the chocolate. Keep it on a low heat to ensure the chocolate won't burn. The chocolate can also be melted in a microwave if you prefer.
 
 
While the chocolate is melting, I separated all of the pink, red and purple sweets from the rest of the colours in the packets. This is because these are the colours most associated with love and Valentine's day.
 
 
I then sprinkled the sweets into the bottom of the cake moulds, and added pink sprinkles.
 
 
Once the chocolate is completely melted, wait for it to cool slightly, as you don't want it to melt the sweets and sprinkles that you have already placed into the cake moulds.
 
 
Once it is cool enough, pour it over the sweets, ensuring they are well coated. I roughly half filled each mould with chocolate. I think if you filled them up to the top, the treats would be too much in one go.
 
 
I then popped them in the freezer to set. I left them for half an hour and they were completely set, however I would check them, as this time may vary depending on how much chocolate you have used and your freezer setting.
 
 
And hopefully they should turn out something like these, or maybe even better!
 
HAPPY VALENTINE'S!
 
xx